Most bird feeding advice assumes you have a yard, a pole, and forty feet of clearance in every direction. Balcony and window bird feeders exist for everyone else: renters, apartment dwellers, and anybody with a railing, a pane of glass, and a view they would rather fill with chickadees than with a parking lot.
I have been feeding backyard birds for twelve years and keeping a written log for ten of them, and the log has taught me one thing that applies no matter how small your space is. Birds do not care how a feeder looks. They care whether they can land on it, whether the food is dry, and whether something scared them the last time they tried. A feeder that fails any of those three tests sits full until you throw the seed out.
This guide is about getting those three things right on a railing or a window, and about the two feeder designs that fit that job. One clamps to a rail with no drilling. One sticks to glass and gives you a face-to-face view of the birds using it. Neither is complicated, but both have a failure mode you can avoid in about ten minutes of setup.
Why you should trust me
I am a licensed wildlife rehabilitator in Madison, Wisconsin. I run the songbird side of a county wildlife rescue out of my garage, the incubator lives in the laundry room, and the scale sits on the kitchen counter because every rehab bird gets weighed in grams. I have been feeding birds for twelve years and logging them for ten: species, first-of-season dates, and cups of seed drawn per week. My county life list is at 214 species, and 38 of them have hit my feeders.
That log is why I care less about product photography than about how fast a feeder empties and how easily it comes apart for cleaning. It is also why I will tell you plainly where a product is wrong for your situation. I have seen what a dirty feeder does to a house finch, and I have watched what a fox squirrel does to a feeder that claims to be squirrel-proof. Small-space feeding has its own set of traps, and they are almost all about mounting and placement, not about the feeder itself.
How I judged these two feeders
Two products fit this article, and both are budget-tier designs aimed at people without a yard. I judged them against the questions I ask about any feeder.
First, mounting. Does it stay where you put it, and does it stay there without drilling, since most renters cannot drill. Second, cleaning. Can you take it apart, wash it, and get it dry before the seed goes moldy. Third, seed capacity. A feeder that needs refilling twice a day will get ignored by week two. Fourth, weather. What happens at the first freeze, and what happens after the freeze thaws and refreezes.
That last one matters more than the product copy suggests. Water gets into every seam, freezes, expands, and finds the weak point. On a balcony or a window, that weak point is almost always the mount, not the tray.
What small-space feeders have to get right
The mount is the whole product. On a clamp-on feeder, the clamp is doing all the work. Check your railing thickness against the clamp's stated range before you order, and check whether the rail has a flat surface to bite. A round pipe rail and a wide flat cap rail are different problems.
Glass is not a wall. A feeder on a window puts birds inches from a surface they can hit. That is manageable, and I will get to the placement rule, but it is a real consideration and not a marketing detail.
Suction cups have a temperature range. They hold beautifully in mild weather and let go in a hard freeze. If your winters go below freezing, treat any suction mount as a warm-season tool or plan a backup.
Cleaning access beats capacity. A small tray that lifts out and rinses in the sink beats a sealed hopper that holds five pounds and cannot be scrubbed.
The two feeders worth hanging
Both of these are simple by design, which is a compliment. Simple is cleanable.
Best for railings and balconies: Kingsyard Clamp-On Deck Bird Feeder for Balcony Railings, No Drill
 Visit on Amazon →
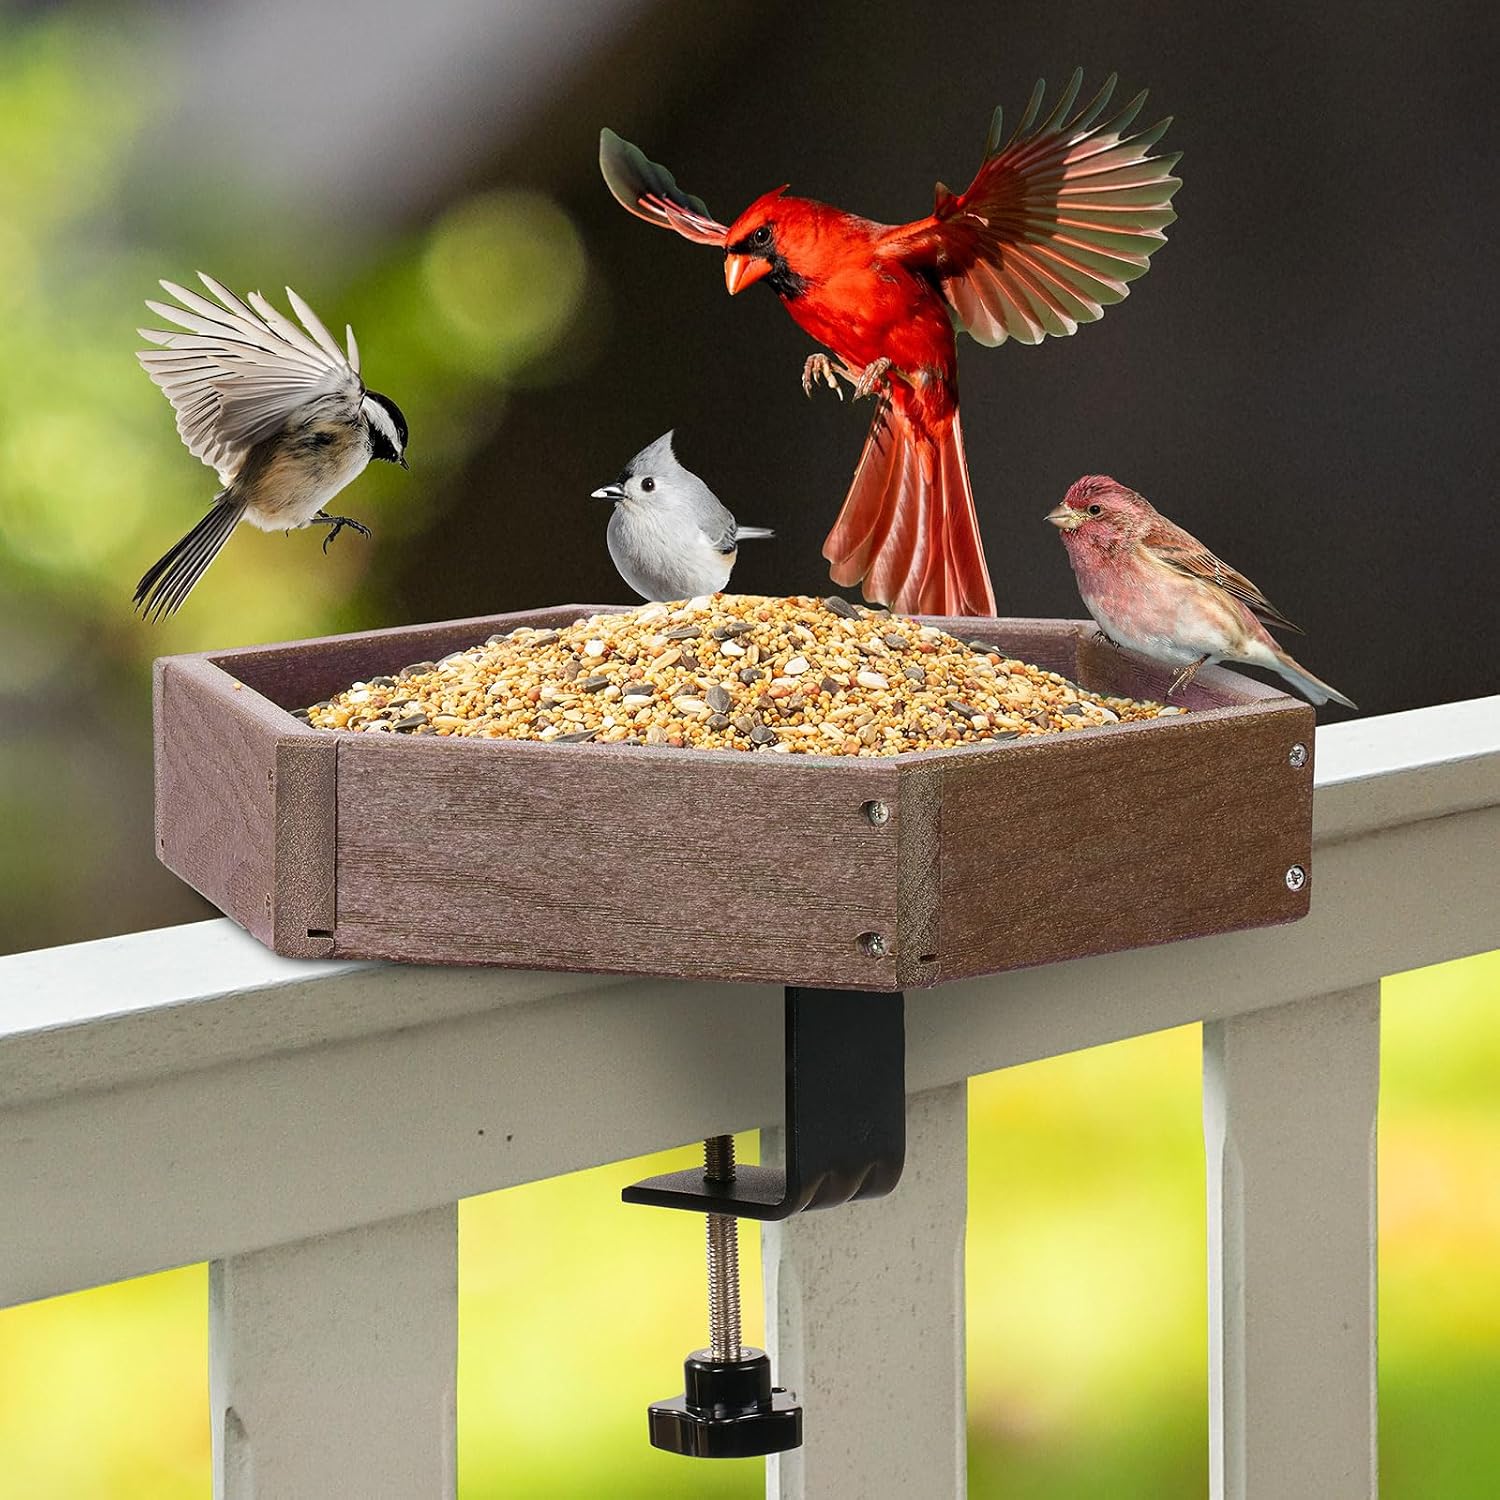
This is the one I would hand a renter first, because the no-drill clamp is the feature that decides whether you can use a feeder at all. It tightens onto a deck or balcony railing with hand-tightened hardware, so nothing goes into the building and nothing has to be patched when you move.
Check current Amazon price, and while you are on the listing, confirm your railing thickness falls inside the clamp's stated range. That is the single most common reason a clamp feeder gets returned.
The advantage over a suction mount is stability. A railing clamp does not care about frost, condensation, or a temperature swing, which makes it the feeder that stays up through a Wisconsin winter. The trade-off is that it only works where you have a rail, and the seed sits lower than a window mount, so you will watch birds from above rather than at eye level.
Flaws but not dealbreakers: Clamp feeders can wobble in high wind if the railing itself is loose, and a loose railing is a building problem, not a feeder problem. Tighten the clamp by hand, not with a tool, so you do not crack the rail cap. If your balcony gets serious wind, mount it on the leeward side.
Anyone with a deck, a balcony, or a porch rail who cannot drill will get the most out of this one.
Best for close-up viewing: Clear Window Bird Feeder with Strong Suction Cups, Clear Bird Feeding Station with Dual Seed Tray & Water Bowl, Easy to Install and Clean for Outdoor Viewing
 Visit on Amazon →
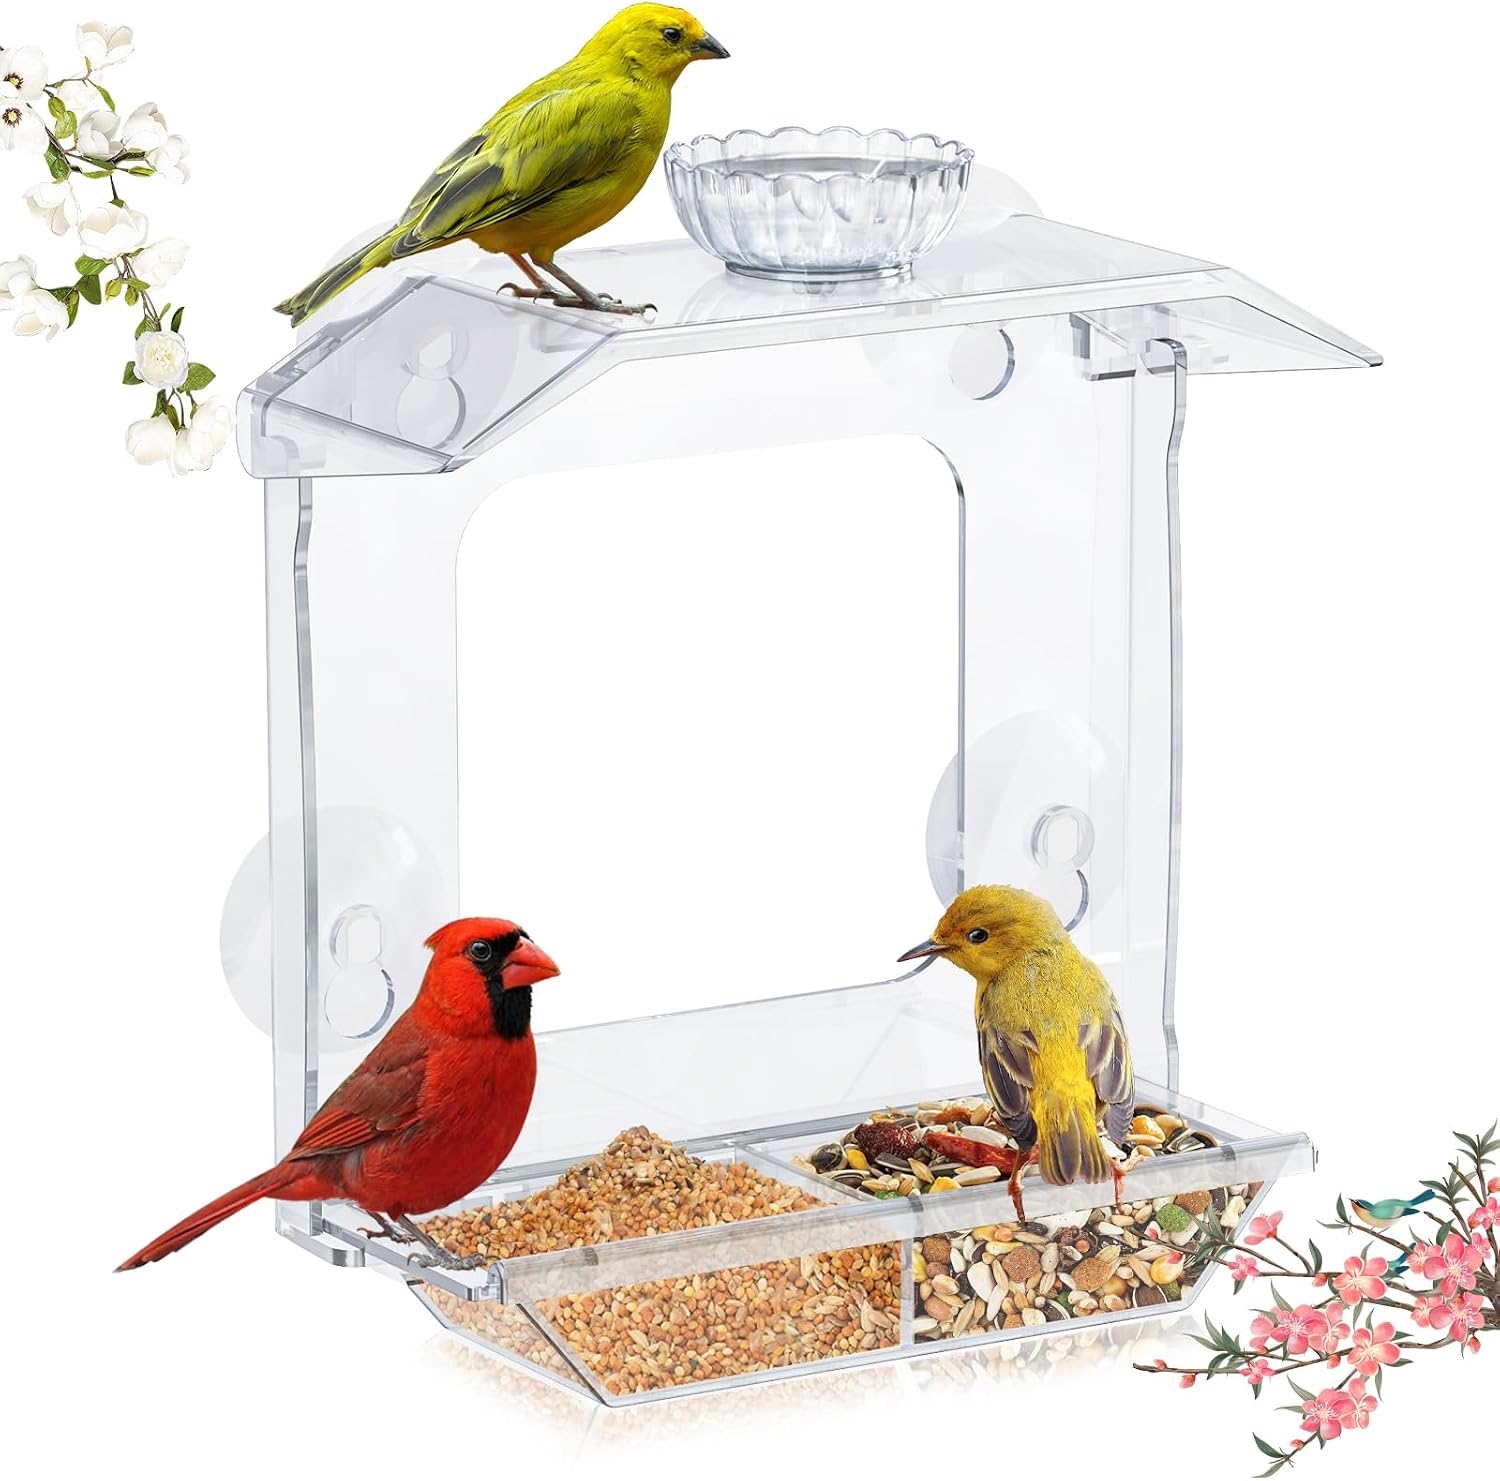
This is the feeder for someone whose only outdoor space is a window. The clear body means you watch birds from a foot away with no glass and no binoculars in the way, and the dual seed tray plus water bowl covers both of the things that pull birds into a small space. Water brings more species to a yard than any seed blend does, and that is true of a windowsill too.
Check current Amazon price, then clean the glass before you mount it. Suction cups need a genuinely clean, smooth, non-porous surface, and a window that has been rained on and dusted for a season is not that surface. Wash the pane, dry it, and press each cup firmly.
Here is my honest caveat, and it is the one I will not soften: suction cups are a warm-season mount in a cold climate. I have seen a cup let go in a hard freeze. If your window sees real winter, plan to bring this feeder in before the first hard freeze and put it back up in spring, or run the clamp-on feeder on the railing through the cold months instead. Used within its limits, it is an excellent, inexpensive way to get birds onto a window.
Flaws but not dealbreakers: The water bowl needs attention. Change it daily in summer, because standing water in a small tray grows algae fast, and a bowl that looks fine can be green by day three. Empty it before a freeze so it does not crack.
Anyone in an apartment, a dorm, or a bedroom with a single window will get the most out of this one.
The actual installation workflow
Step one: Pick the window or rail before you pick the feeder. South and east exposures get morning sun and dry out faster, which means less mold in the tray. If you have a choice, take the one you can see from where you sit.
Step two: Measure the mount. For the clamp, measure the rail thickness at the spot you intend to use, not at the thickest point of the whole railing. For the window, check that the glass is smooth, unpainted, and reachable without a ladder.
Step three: Clean the surface. Soapy water on the glass for the suction model, and a wipedown of the rail cap for the clamp. Both mounts fail on dirt before they fail on design.
Step four: Mount empty and let it sit. Hang the feeder with no seed for a day. This tells you whether the mount holds under its own weight, and it lets you fix a slipping cup or a loose clamp before there is food involved.
Step five: Add a small amount of seed. One cup, not five pounds. If the feeder gets ignored for a week, you have not wasted a full hopper. If birds find it in a day, refill.
Step six: Set your cleaning day. Pick the same day each week. Take the tray out, wash it in hot soapy water, rinse, dry it fully, and put it back. This is the step that keeps birds healthy and the step almost everyone skips.
Step seven: Add water and keep it clean. If your feeder has a water bowl, dump and refill it daily in warm weather. In a small tray, water is either fresh or it is a problem.
Step eight: Adjust for the season. Warm months: window feeder in the best viewing spot. Cold months: clamp feeder on the rail, window feeder inside. Rotating them is not a compromise, it is just how small-space feeding works in a climate with a real winter.
Placement, window strikes, and the three-foot rule
Put a window feeder within three feet of the glass. That sounds backwards, since the glass is the hazard, but it is the standard guidance and it holds up: at that distance a bird leaving the feeder cannot build up enough speed to hit the pane hard, and it can see the glass on approach. A feeder set fifteen or twenty feet back is the dangerous arrangement, because that is exactly the distance where a startled bird reaches full speed.
If you have a larger window and room to work with, decals or a screen help, but placement does more than any film. And if you ever find a bird on the ground after a strike, put it in a dark box in a quiet room and call a rehabilitator rather than offering food or water. A window strike is a concussion, not a hunger problem.
Cleaning and seed
Buy black oil sunflower or sunflower hearts. Skip blends padded with milo and red millet, which birds scratch out and leave to mold in the tray. In a small feeder, filler is worse than useless, because a tiny tray full of uneaten seed is a tiny tray full of damp, spoiled seed.
Clean weekly, and take the feeder apart to do it. A hose spray is not cleaning. Hot soapy water, a bottle brush in the corners, a full rinse, and complete drying before the seed goes back in. Every salmonella case I have seen in rehab traced back to a feeder nobody had taken apart since fall, and small feeders are not exempt from that rule just because they hold less seed.
What these two feeders are not
Neither of these replaces a pole-mounted tube feeder with a baffle, and neither is built to defeat a determined squirrel. A railing clamp is reachable from the deck, and a suction-mounted tray is reachable from wherever a squirrel decides to climb. If squirrels are your main problem, solve that with a pole and a baffle, not with a window tray.
They are also not hummingbird feeders. If you want ruby-throated hummingbirds on a balcony, that is a separate setup with its own cleaning schedule, and a nectar feeder that takes more than a minute to rinse becomes a mold experiment by August.
What these two do well is put seed and water where you can watch it, with no drilling and no yard. That is a specific job, and they are built for it.
What this costs
Both feeders sit in the budget tier, so check current Amazon price at each link above rather than trusting a number that may have moved. Compare that against what a pole system costs, plus a baffle, plus the hardware, and you will see why the clamp-on design makes sense for a first feeder on a balcony.
The real cost is the seed and the cleaning time. A small feeder draws less per week than a tube, but it needs refilling more often, and a dirty small feeder is exactly as much of a disease risk as a dirty large one. Budget ten minutes a week. That is the whole maintenance bill.
Hang it empty, let it sit a day, then put out one cup of black oil sunflower and start your own log. First species, first date, cups per week. Ten years from now you will be glad you wrote it down.