Most backyard bird feeder setups fail for one of three reasons: the squirrels empty them, the seed molds in the tray, or the feeder is such a chore to take apart that it stops getting cleaned. A working backyard bird feeder setup solves all three before the first bird lands, and it does that with two pieces of hardware and a weekly habit, not with a shelf full of gadgets.
I have been feeding birds in Madison, Wisconsin for twelve years and keeping the log for ten of them: a spreadsheet with every species that visits, first-of-season dates for migrants, and how many cups of seed each feeder draws per week. Thirty-eight species have hit my feeders out of a 214-species county list. The log is why I recommend what I recommend, and it is why I stopped trusting the phrase "squirrel-proof" the moment it appears on a box.
Below is the setup itself: where the pole goes, what hangs on it, which seed goes in, how to clean it without skipping weeks, and how to add a camera feeder that tells you which bird showed up while you were at work.
Why you should trust me
I am a licensed wildlife rehabilitator. I work part time at a small animal clinic and run the songbird side of a county wildlife rescue out of my garage, which means the incubator is in the laundry room and the scale lives on the kitchen counter. Every rehab bird gets weighed in grams. Every feeder recommendation gets measured in cups per week.
That combination changed how I write about feeders. The salmonella and house finch eye disease cases I have handled in rehab almost always trace back to a dirty feeder nobody took apart since fall. So cleaning is not a bonus feature in this guide, it is the first filter. I also test squirrel claims the slow way: a neighborhood fox squirrel gets three weeks on a feeder before I call anything squirrel-proof, and if it reaches seed once, the word becomes "resistant" in my write-up.
How I picked and how I tested
I do not recommend a feeder that has not been through a full season in this yard. For this guide the shortlist was deliberately narrow: one feeder that can hold its own against squirrels without turning into a pole engineering project, and one camera feeder that a person with a phone and a backyard can actually run.
Every candidate had to answer the same five questions. Will birds use it, or will it sit pretty on the pole? Can I take it apart and clean it in under ten minutes? What does a determined fox squirrel do to it in week one? Will it survive a Wisconsin February of freeze, thaw, freeze? Would I still hang it after four seasons? A feeder that fails the cleaning question never makes the list, no matter how it looks in the product photos.
Two products cleared those questions, and they do different jobs. One holds the seed. One tells you who ate it.
The feeder that has to survive the squirrels
Start here if your yard has squirrels, because it does. The feeder you hang first is the one that has to stay full long enough for birds to find it, and that means buying for the squirrel problem before the bird problem.
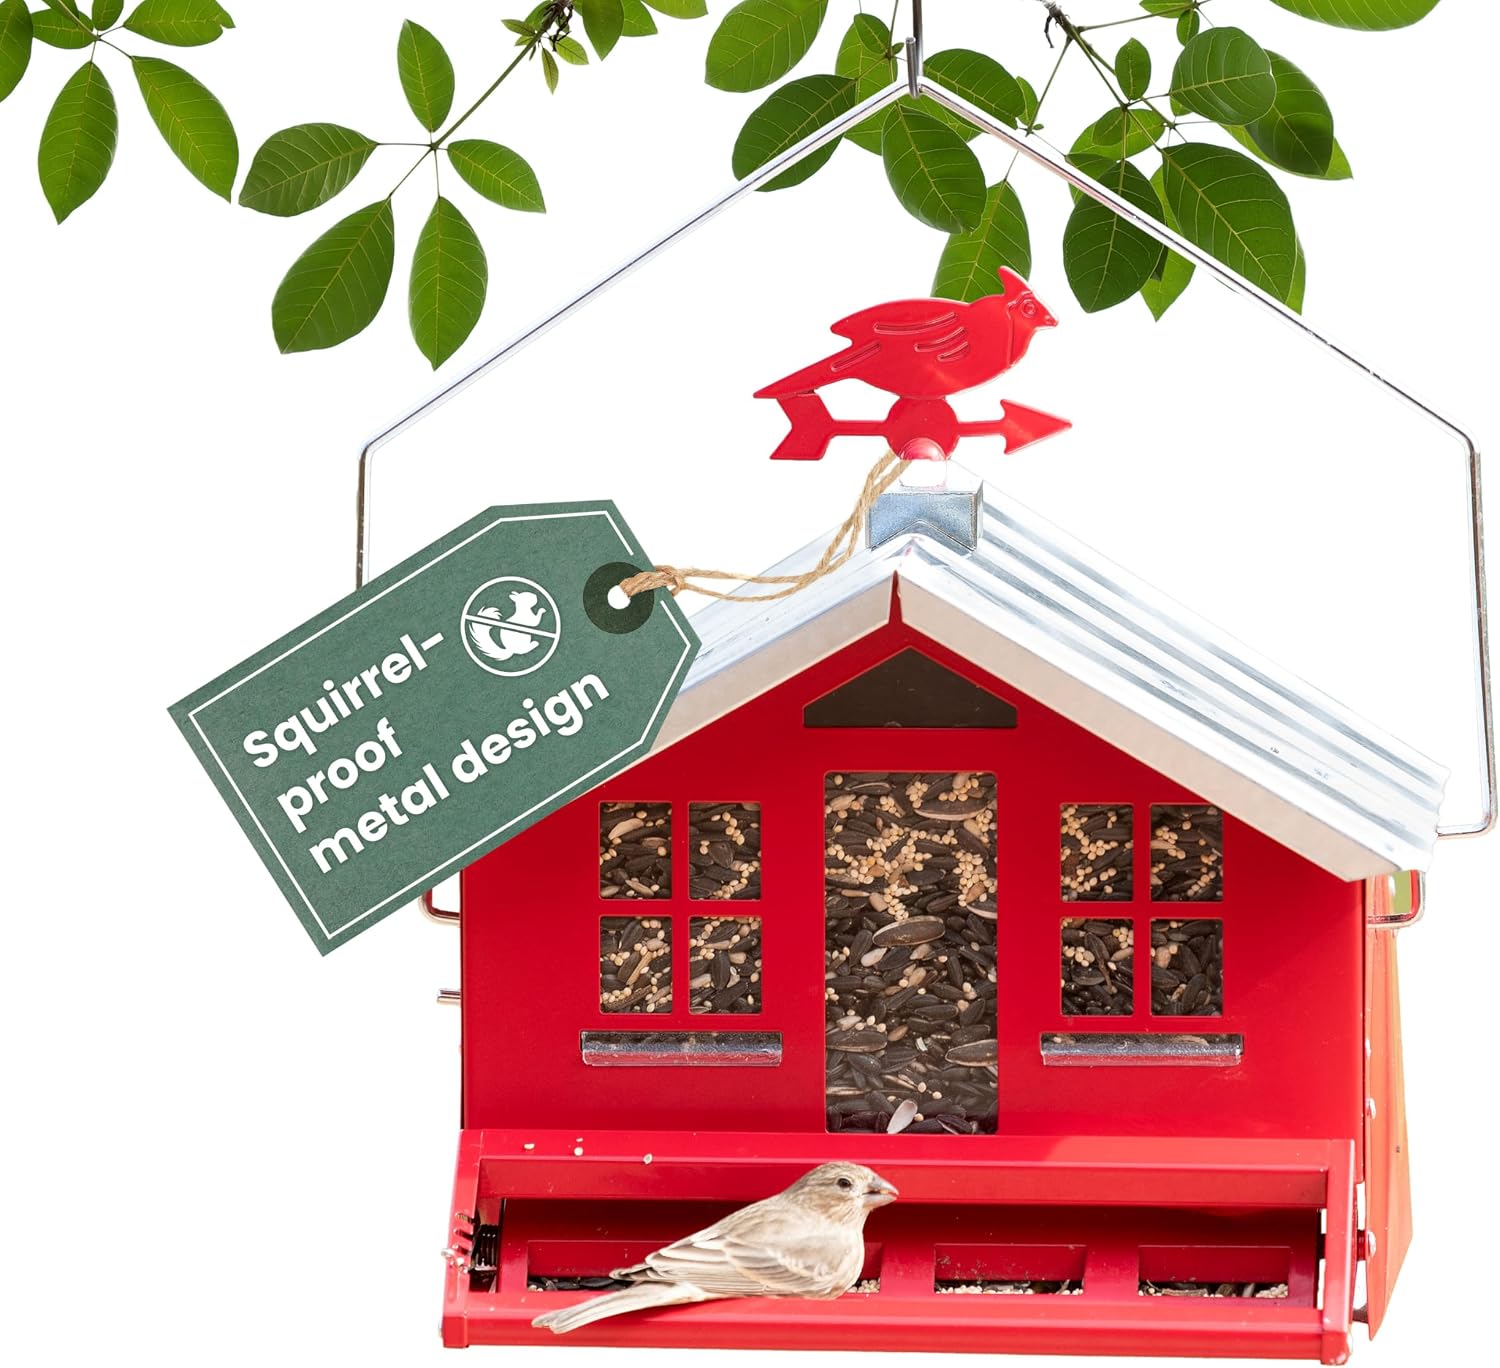
Our pick: Perky-Pet Squirrel-Be-Gone II Country Style Bird Feeder, 8 lb Seed Capacity
 Visit on Amazon →
The mechanism that matters here is the weight-activated cage. When something heavier than a bird settles on the perch ring, the shroud drops and covers the seed ports, so a squirrel gets a mouthful of metal instead of sunflower hearts. That is the design I look for in this price class, and it is the reason this feeder is the one I would hand a new feeder owner with a squirrel problem.
The 8 lb seed capacity is the second reason. Capacity is not about how it looks on the pole, it is about draw. A feeder that holds more seed gets refilled less often, and a feeder that gets refilled less often stays full during the week you are busy, which is exactly when birds decide whether your yard is worth a daily stop.
Two things to check before you hang it. First, the tension setting: weight-activated feeders have an adjustment, and it needs to be set light enough that a cardinal or a jay does not trigger the shroud. Watch for a few minutes after you hang it and confirm the ports stay open for birds and close for anything heavier. Second, the mount. This feeder works best on a pole with a baffle below it rather than swinging free from a branch, because a feeder that can be rocked from above is a feeder a squirrel will spend all day on.
Flaws but not dealbreakers: the country style housing collects hulls and dust in the corners, so it is a feeder you have to take apart rather than hose down. That is true of every feeder worth owning, and I would rather have a feeder that comes apart than one that hides the mess.
Where it fits: anyone with squirrels, a pole, and a yard that gets cardinals, chickadees, titmice, and finches. If you have no squirrels at all, you can spend less.
The feeder that tells you who showed up
The second feeder answers a different question. The log tells me what visited over a week. A camera feeder tells me what visited at 6:40 a.m. on a Tuesday while I was in the laundry room with a nestling in a shoebox.
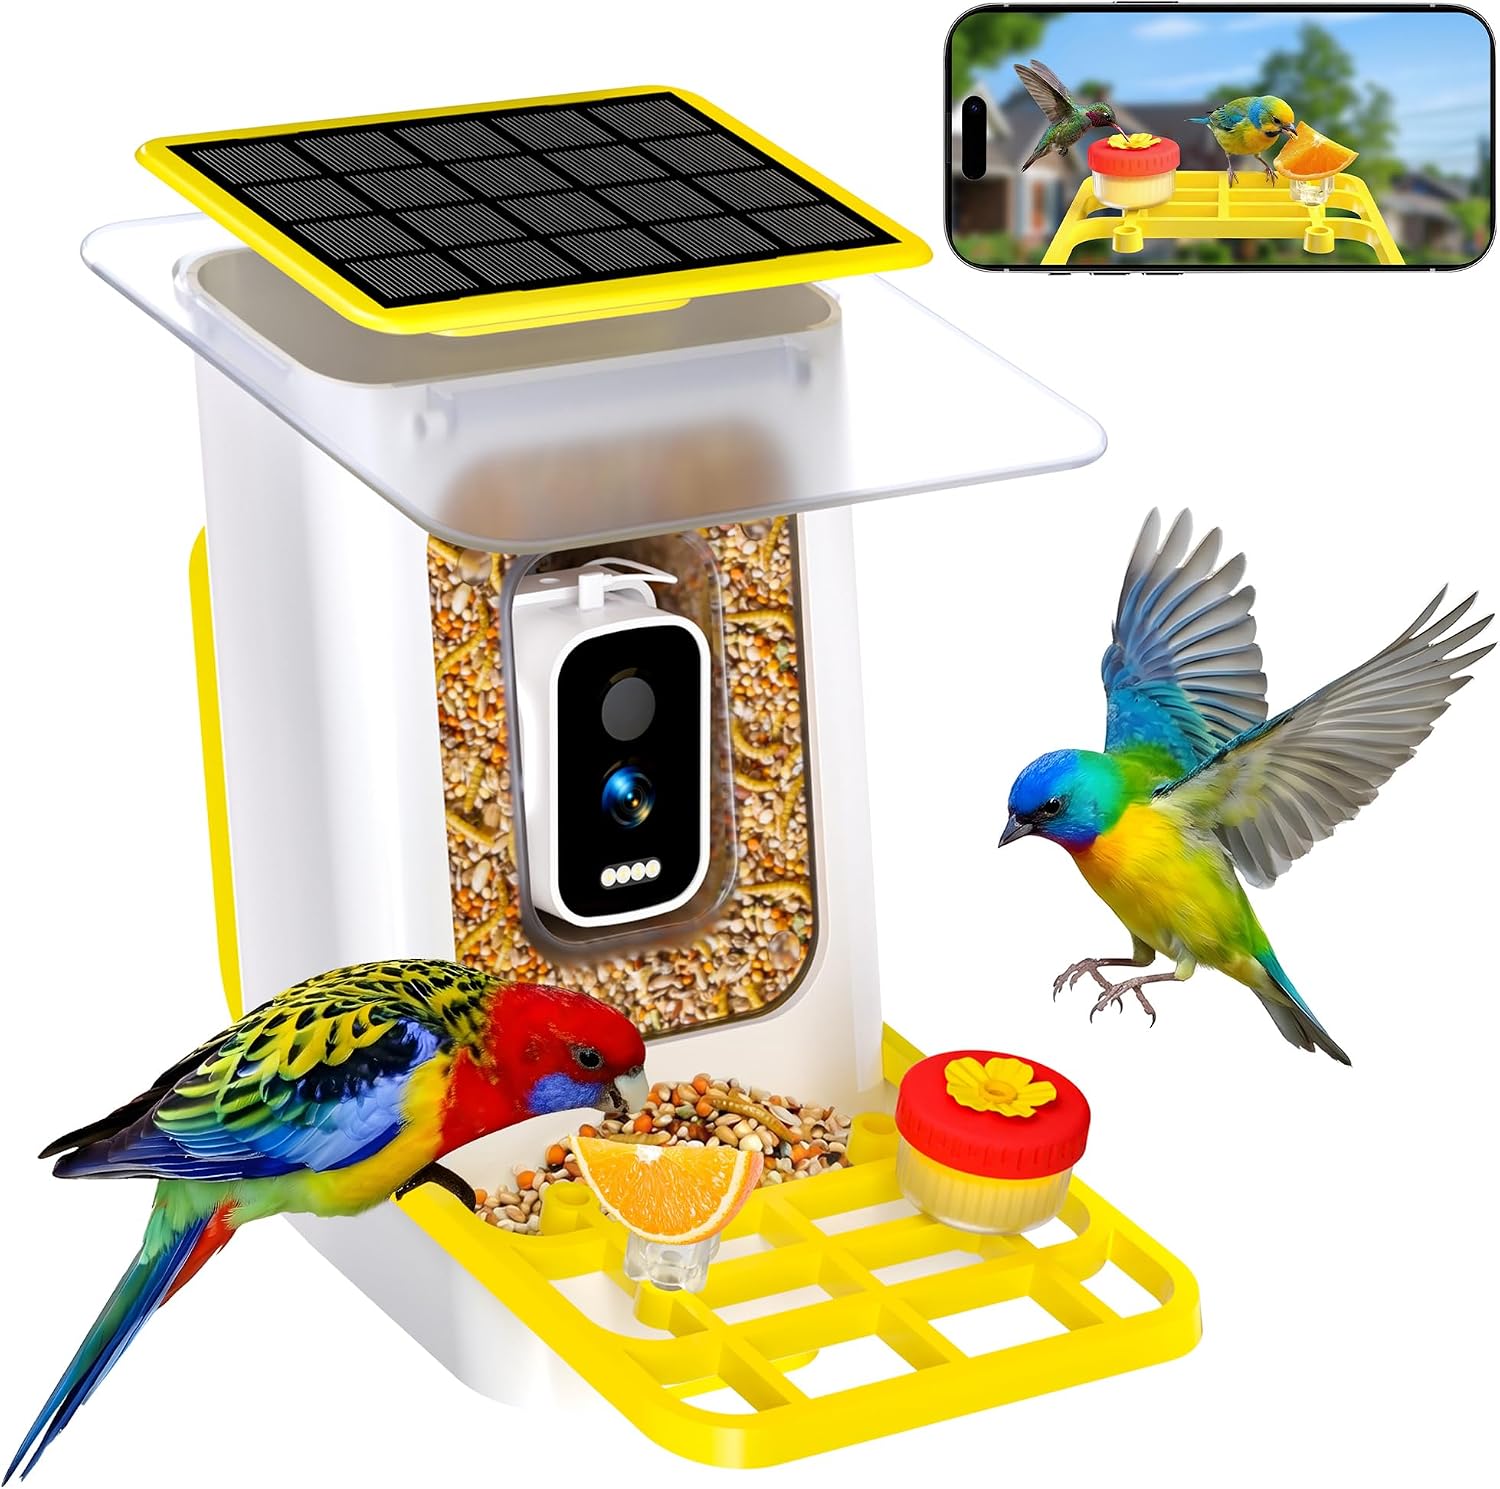
The camera pick: Bird Feeder with Camera, GTSABWAY Smart AI Identify Birds Camera with Solar Powered, Wireless Auto Record 5M HD Birds Video in Backyard, Instant Notifications - Yellow
 Visit on Amazon →
This one combines the feeder and the camera in a single unit: a solar panel keeps it topped up, it records 5M HD video wirelessly, it runs an AI identification routine on what it sees, and it pushes instant notifications to your phone. For a yard that gets a lot of traffic and a person who cannot sit at the window all morning, that combination is the whole point. The solar panel means fewer charging sessions, and the notifications mean you find out about a first-of-season bird the same morning instead of at the end of the week.
Before you buy, verify three things, because they decide whether a camera feeder is a joy or a paperweight. First, Wi-Fi signal at the pole. Walk out with your phone and check the signal where the feeder will hang, not at the kitchen window. Second, the app's terms: read what the identification feature and video storage require before you commit, since that is where camera feeders differ most from each other. Third, solar exposure. A solar panel in shade is a battery with extra steps, so plan on a spot that gets several hours of direct sun.
Then treat the AI identification as a starting point, not gospel. It is very good with the obvious visitors and less certain with the brown jobs, the sparrows and the fall warblers that all look like the same small bird at 20 feet. Confirm anything unusual before you write it in the log. That is not a knock on the product, it is how identification works.
Flaws but not dealbreakers: a camera feeder is a heavier, more complicated object than a plain tube, so mounting matters more. Put it where you can reach it without a ladder and where the camera looks across the perch, not into the side of a baffle.
Where it fits: anyone who wants a record of visitors, works during the good morning hours, or is building a yard list and wants the first-of-season dates without sitting still.
The setup, step by step
Step one: pick the spot before you buy anything. Feeders belong either within three feet of glass or more than thirty feet from it, nothing in between. A feeder three feet from the window prevents window strikes because a bird leaving the perch cannot build up enough speed to hurt itself. The same feeder at fifteen feet is a bird launcher aimed at your living room. My white-throated sparrow taught me that the hard way, and it is why my first window feeder went up three feet from the dining room glass.
Step two: give the feeder cover nearby. Birds want a shrub or a tree within ten or fifteen feet so they can stage before they commit. Watch the approach and you will see it: they land in the lilac, check the yard, then drop to the perch. No cover, no customers.
Step three: set the pole and the baffle. Sink or stake a pole, then add a baffle below the feeder and keep the feeder itself at least five feet off the ground. A squirrel that has to climb a pole and then negotiate a baffle is a squirrel that gives up and eats your tulip bulbs instead. Also check what hangs above: a branch within ten feet and ten feet up is a launching platform, so trim it back.
Step four: hang the squirrel-resistant feeder and tune it. Fill it, hang it, and watch the first ten minutes. Birds should reach the ports freely. If the shroud drops for a cardinal, the tension is too tight.
Step five: load it with seed worth buying. Black oil sunflower or sunflower hearts, and nothing with milo or red millet in the ingredient list. Filler seed gets kicked to the ground uneaten, molds in the rain, and doubles your platform cleaning. Hearts cost more per pound and produce zero hull litter, which is the trade I make on a deck every time.
Step six: mount the camera feeder and connect it. Check Wi-Fi at the pole, confirm the solar panel faces the sun, and set the notification window so your phone is not buzzing at 5 a.m. in June. Then point the camera across the perch and confirm you can see birds, not beaks.
Step seven: clean on a schedule, not on a feeling. Once a week in warm weather, every two weeks in deep winter, take the feeder apart. Hot soapy water, a rinse, a dilute bleach soak if a sick bird has been around, then dry it fully before it goes back up. A dirty feeder is a disease vector with a perch, and the rehab intakes prove it every season.
Step eight: keep the log. Cups of seed per week, species seen, first-of-season dates. Two minutes a day. Ten years in, it is the most useful thing I own, and it is what tells me whether a feeder is actually working or just sitting on the pole looking busy.
Placement rules and the mistakes I see most
The mistakes are consistent enough to list. Suction cup window feeders let go in the first hard freeze, which is why my long-term window feeder has a bracket that bolts through the sill. Ant moats dry out by Tuesday and need refilling more often than people expect. Feeders get hung at fifteen feet from glass and then people wonder about the thud. Seed blends get bought on price and the tray fills with milo nobody touches. Red dye goes into hummingbird nectar for no reason that helps a bird.
The other mistake is seasonal. Bird feeding is a year round job. The best months in my log are May and June, when migrants pass through and the yard gets loud, and the quietest stretch is late August, when the garden takes over and I admit the cleaning schedule slips. Birds do not stop needing food in July, and a feeder that comes down in spring comes back to a yard that has to relearn it.
What this setup costs
Hardware is the cheap part. Check current Amazon price for the Perky-Pet feeder and check current Amazon price for the camera feeder, and you have the two line items that matter, because seed is the recurring cost and cleaning time is the real expense. The math I run is cost per day of use: divide what you spend by the seasons you keep the feeder hanging, and compare that to the cups per week the log records. A feeder that draws birds for four years is a bargain at almost any price. A feeder that sits ignored because the squirrels own it is expensive at any discount.
What I left out and why
This guide is about the feeders and the setup around them, so water, suet, and optics are not here. Water brings more species to a yard than any seed blend, and the bath beats every feeder combined in my log from June to August, but it is its own project with its own placement rules. Suet is the winter workhorse and belongs in a cold-weather guide. Binoculars are a separate purchase decision, and the short version is that you want a pair that focuses close enough to watch a feeder fifteen feet away, which rules out more models than people expect.
Get the pole, the two feeders, the seed, and the weekly cleaning habit in place first. Everything else is an upgrade to a system that already works.